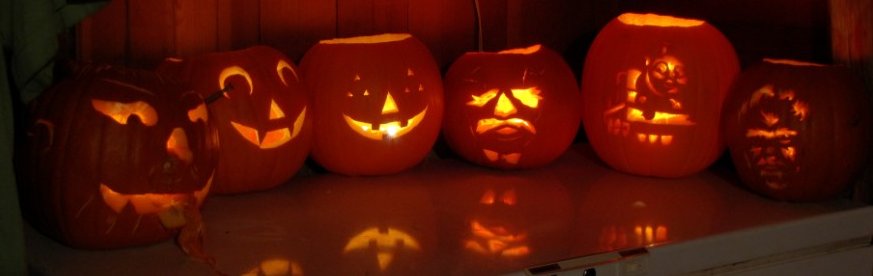
How to Photograph a Halloween Pumpkin
Good:
- It is difficult to shoot outdoors because of street lights or weather, so I usually put my pumpkins in a dark garage or shed at night
- Find a sturdy tripod and ideally use a remote shutter release. If you don't have one, try setting a 2s delay on the shutter to avoid vibrations.
- Set your camera for the lowest f-stop and the longest shutter speed. You will find that the photo is very over-exposed. The beauty of a digital camera is that you can take hundreds of photos at no cost and instantly look at the results. Reduce the shutter speed until you find a good setting. Then take some photos lighter and some darker - you can sort them later. (For reference, a good combination is f/6.3 and 1.5s)
- Another setting that is worth noting is the ISO, or what used to be referred to as film speed. ISO100 gives the best quality photos with the least noise, but takes the longest to shoot. My best camera can shoot ISO25600 but there is so much noise that the pictures are worthless. I find a happy medium is around ISO200 or ISO400.
Better:
- Whenever possible shoot in RAW format. Normally the difference between RAW and JPG is trivial, but for these high contrast photos it is important. A RAW file can hold 4x as many colours and shades, so where a JPG records a solid mass of white or black with the lit pumpkin, a RAW file records all the detail. Later on tone-mapping software can automatically balance the lighting and colours to produce a good result.
- If you don't have a RAW camera, shoot HDR instead. (In fact, on my own photos I usually shoot HDR and RAW together, but I am a bit fanatical about my photos). Here's how you do it:
- If your camera has exposure bracketing turn it on and set the exposure range as high as possible.
- Depending on your camera, either press the shutter release three times or hold the shutter release while you camera automatically snaps three photos.
- When the photos are on your computer, use any HDR program with tone-mapping (I like Photomatix Pro) to combine the three exposures into a single photo with a high dynamic range.
- (It should be noted that since writing this, new cameras have hit the market that have built-in HDR photography, which is even easier to use for low light photography)
- Another advantage of modern digital cameras is the live view setting. Most cameras have trouble focusing in low light. So I find it is better to use manual focus, and then use the LiveView on the LCD screen zoomed in to its highest magnification to refine the focus to be tack sharp. It takes a little more time, but the results are worth it.
- Also in the category of focus, dSLR cameras have some disadvantages that need to be removed. The image stabilization feature is great for handheld shooting, but it actually increases the vibrations when it is on a sturdy tripod. Turn it off. And in dSLR cameras, the mirror inside the camera moves when the shutter is pressed - so if available turn on the mirror lockup or related setting.
Best:
- The bigger the aperture, the easier it is to photograph in low light. With a P&S camera you have no choice, but with a dSLR you can change the aperture by changing the lens. If you are a poor struggling student (or recent graduate like me) and cannot afford the expensive luxury lenses, there are some bargains. I personally use a Canon 50mm f/1.8 for a lot of my nighttime photography - and most camera shops carry these for about $100 now. But the advantage is that you can do point-and-shoot photography in almost pitch black settings! (In fact, when I was doing pumpkin photography with this lens I had to reduce the exposure to -2 because the photos were too bright)
- As I said above, if you are obsessive you can also shoot RAW and HDR together.
Personally I use an f/1.8 lens on a tripod with a remote shutter and exposure bracketing, shooting in RAW format, and then compose the final pictures using HDR software.
