Robot Gallery
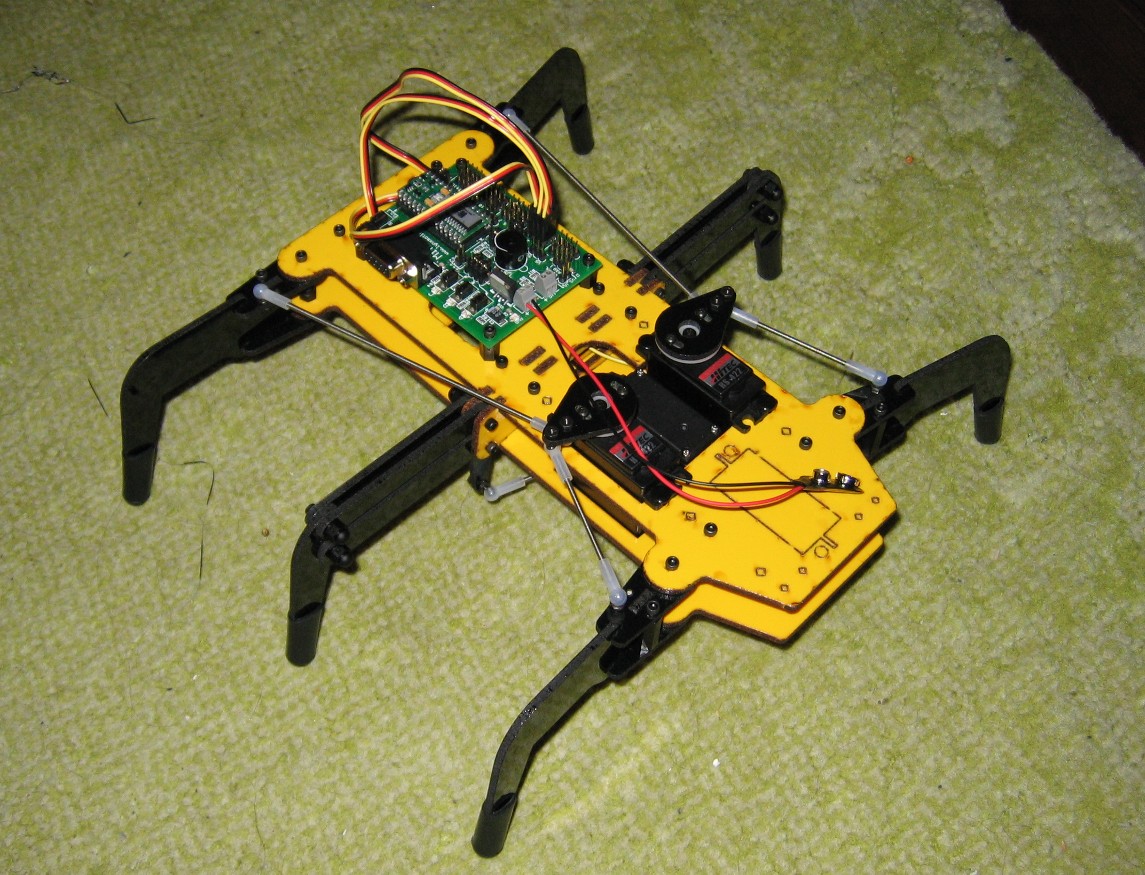
My first autonamous robot. This fellow uses a Basic-24 chip on a BasicAtom board for a brain, on a Lynxmotion Hexapod kit. It navigates around using a two IR-LED sensor system, but so far it just wanders my house with no other use. Unfortunately the original kit hardware has some faults which makes its movements unreliable, and I haven't had time to repair it properly.
This one isn't my design, but was built from a BEAM kit and then modified. Instead of using a fully programmed microcontroller, it is a simple phototropic circuit that directs the creature towards or away from light sources. It also has very simple piano wire touch sensors to prevent collisions.
This little fellow is a more recent creation of mine, which has been dubbed Herbie by others who have met him. Originally I built him around a BasicAtom board on a Rogue Robotics ATR base, but lately I have upgraded him to use an Arduino board which is a little more powerful. His 'eyes' are actually an Ultrasonic distance sensor capable of determining the distance to objects. This is mounted on a two servo system that provides him with the ability to turn his head almost 90 degrees to either side and up and down. He is currently programmed to drive around my house examining walls and doorways all around him, and I have added some preliminary mapping functions so he can calculate and remember the best routes to take.
This is another simple robot built out of gifts and spare parts, and is used mostly for experimenting with new components before I add them to my main robot.
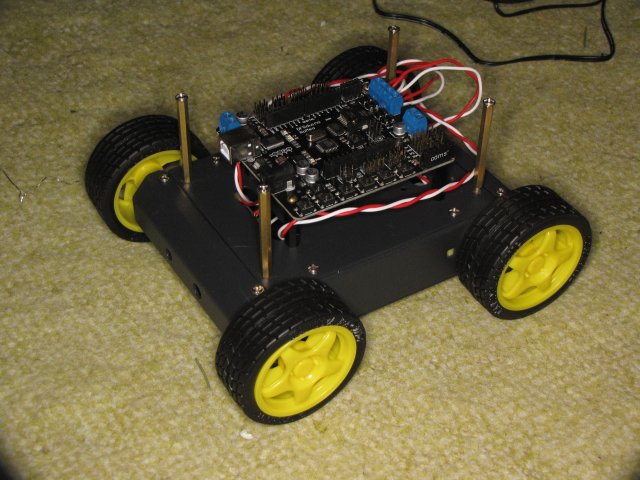
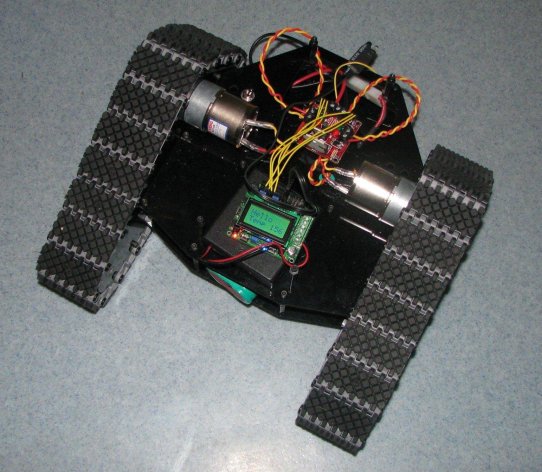
It uses a DFRobotics four-wheeled base, with all four axles independently driven by electric motors. (This is also the kit that I was given one Christmas that has no English instructions in print or online at the time, so I had to improvise). At present it is controlled with a DFRobotics Arduino-style board, but this board also includes built-in motor controllers and separate power supplies, as well as three-pin connectors for each of the IO-channels.
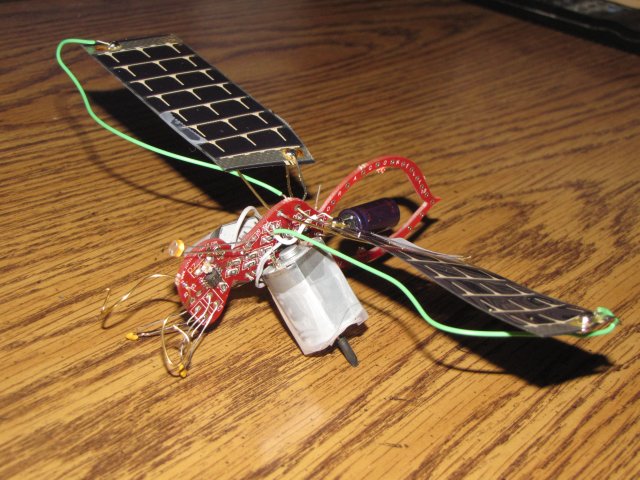
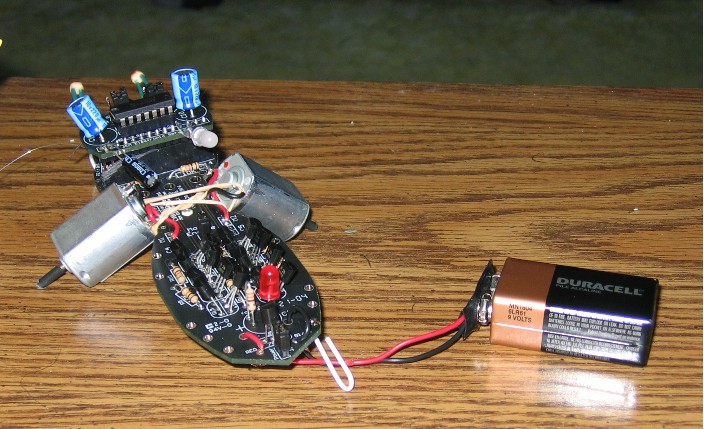
Another BEAM robot assembled from a kit. This one uses surface soldering tecniques as well as taking advantage of the feedback in LEDs to produce a differential light monitor. It is also fully solar powered.
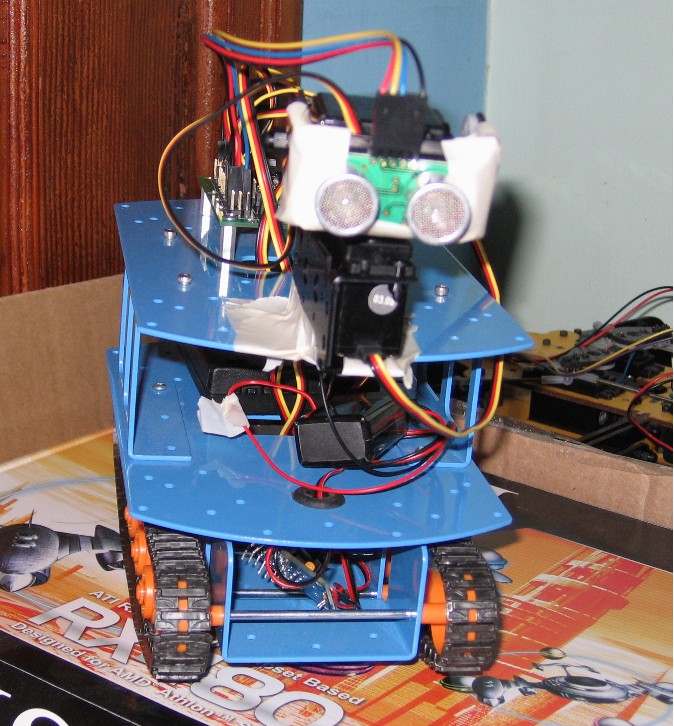
My latest creation. This one uses a kit built Lynxmotion Tri-track base running off of an independent NiCad battery for the base, with motors controlled by a kit built H-bridge board with an L298 IC. The original brain I installed was a Polulu Orangutan (shown in the photo), but I have since added a more versatile Arduino Deicimila board and I am converting the Orangutan board to run subprocesses such as sensor reading or mapping. The sensors on this robot include two IR-LED collision sensors, a light level sensor, and I am working on adding a sound sensor. I am also working on building a proper chassis for this unit, with proper mountings for the sensors and boards (as opposed to lying loose on the upper platform)
On the programming side, I have taught it to navigate buildings and some minimal mapping and route planning functions. Next I am either going to add a neural network so that it can begin to learn to use its sensors on its own, or train it to follow a moving object using a modified webcam.
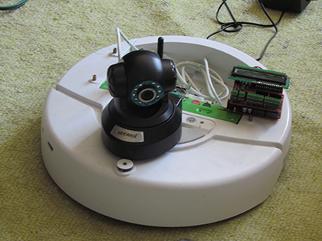
This one is more experimental but less customized. The base is an iRobot Create (the DIY / Maker version of the robotic vacuum, Roomba) which is preprogrammed with standard routines for navigating rooms and a decent sensor package built in. I have added a platform using computer standoffs and a sheet of thermal plastic, and onto that mounted a Freeduino board. The I/O ports on the port are connected into two DE-9 sockets on the base. At present I am working on mounting a webcam and a bluetooth interface, to make a telepresence style robot. (The camera and Freeduino in the photo are held on with double sided tape, but I am going to machine a framework once I have finalized the positions of everything)
In June 2018 I started on a longterm project to build my own astromech droid. The initial design is based on James Bruton's R6 design, but I will add customizations as the project evolves. At this point I do not have any photos to share as I am just beginning to print the framework on my 3D printer. I hope to begin assembly in the Autumn, and add the electronics early in the new year.
Stores & Suppliers
Circuit Design Software:
- Fritzing - Virtual breadboard & PCB designer
- Virtual Breadboard - Virtual breadboard & simulation